Category Archives: Mikrotik

OpenVPN Server Setup on Mikrotik RouterOS

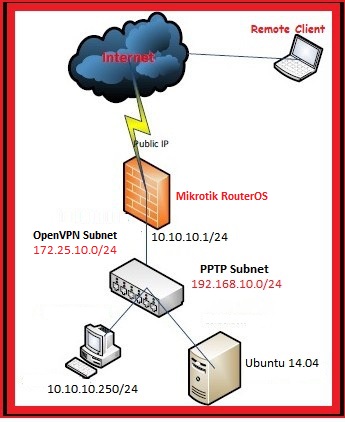
In this post, I’ll describe the step by step procedure to setup Mikrotik RouterOS as OpenVPN server. I’ll use the Ubuntu Server in order to create CA, server and client(s) certificates.

openvpn

Read more of this post

PPTP Server Setup on Mikrotik

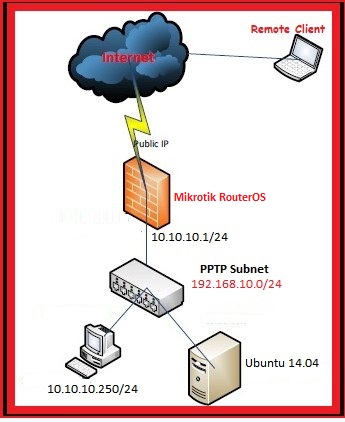
In this post, we’ll see how to configure the PPTP server on Mikrotik.

pptp

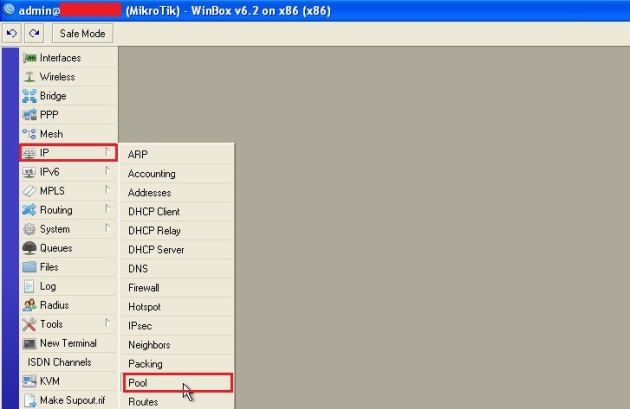
Login to the Mikrotik RouterOS via Winbox and go to the IP —> Pool:

1

Read more of this post

Linux IPSec Site-to-Site VPN: AWS VPC & Mikrotik Router

In this tutorial, we will use the Site-to-Site VPN scenario with the modification and one of the customer site that is using Mikrotik router, which is also acting as gateway for LAN plus the vpn gateway while from the AWS side, we are using the exact same Ubuntu Linux router.

Please review the previous tutorial before starting this tutorial, as I’ll use the previous tutorial as the base for this one.

mikto

Note: Please don’t waste your time in hacking, all these public devices and IP(s) are Temporary, I have destroyed them after finished this tutorial.

VPN Configuration on Mikrotik Site:

Open the IP->IPsec window in WinBox:

1

Read more of this post

Multiple DHCP Servers on single Mikrotik

mikrotikScenario:

Mikrotik dhcp server with 3 network cards (LAN,Wireless,WAN), WAN is connected to Internet, Wireless is connected to the 10.10.10.0/24 subnet and serve as dhcp server  while LAN interface serve for 172.16.10.0/24 subnet.

Read more of this post

Configure Mikrotik DHCP to assign ip address to only authorized client(s) {2nd Method}

To achieve the same goal, you can also consult this post and decide yourself that which method suit you better!

mikrotik

Scenario:

Mikrotik is working as dhcp, dns, and default gateway for local network.

Read more of this post

OSPF routing between Cisco,Ubuntu,CentOS and Mikrotik Router!

Scenario:

  • Routers: 1 Ubuntu Linux with 3 nics, 1 Centos Linux with 3 nics, 1 Cisco 3640 Router with 3 FastEthernet interfaces and 1 Mikrotik Router with 2 interfaces.
  • Clients: 3 Windows Xp with 1 nic.
IP Details

All the Routers in this scenario have a default password of “zebra“.

Cisco Router:

  • fe0/0: 10.10.10.1/24
  • fe1/0:10.10.50.1 /24
  • fe2/0: Getting through DHCP

UbuntuRouter:

  • eth0: 10.10.10.2/24
  • eth1: 172.16.10.1/24
  • eth2: 10.10.100.1/24

CentOSRouter:

  • eth0: 172.16.10.2/24
  • eth1: 192.168.10.1/24
  • eth2: 10.10.150.1/24

Mikrotik Router:

  • ether1: 192.168.10.2/24
  • ether2: 10.10.200.1/24

Clients:

  • Ubuntu-Desktop: 10.10.50.50/24
  • WinXP-1: 10.10.100.50/24
  • WinXP-2: 10.10.150.50/24
  • WinXP-3: 10.10.200.50/24

Cisco Router Configuration:

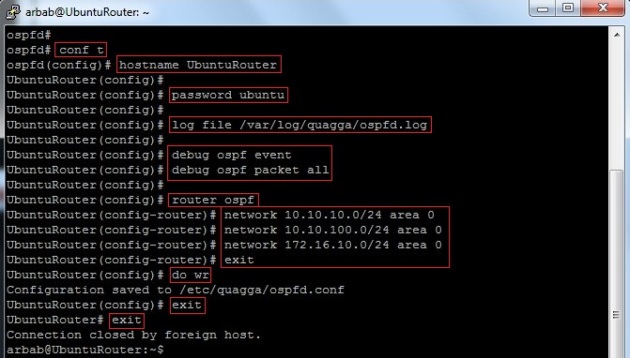
UbuntuRouter Configuration:

Restart the Router!!!

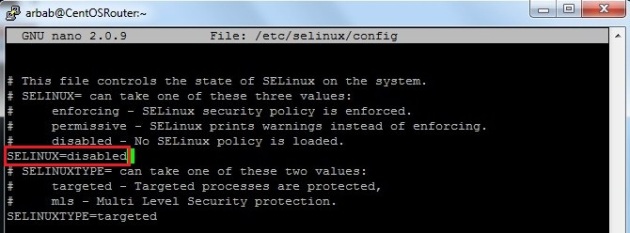
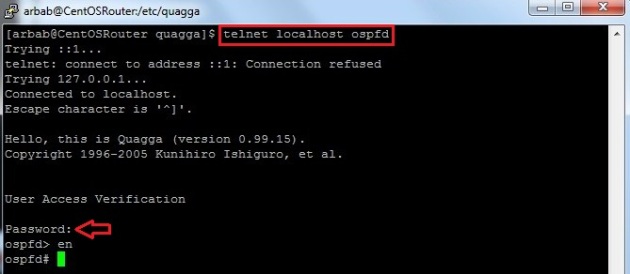
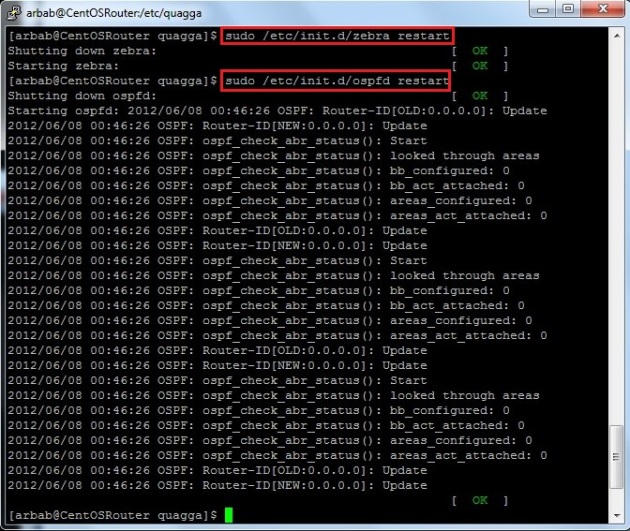
CentOSRouter Configuration:

Restart the Router!!!

Mikrotik Router Configuration:

Neighbor verification from Routers:

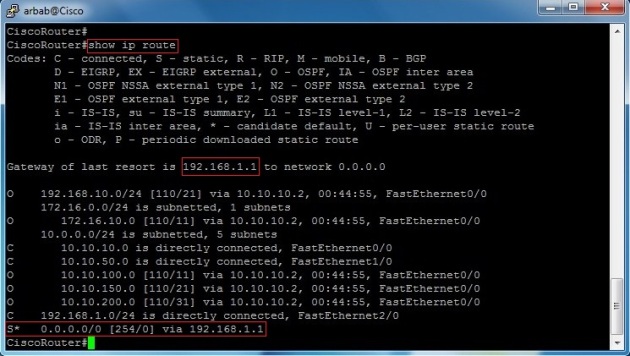
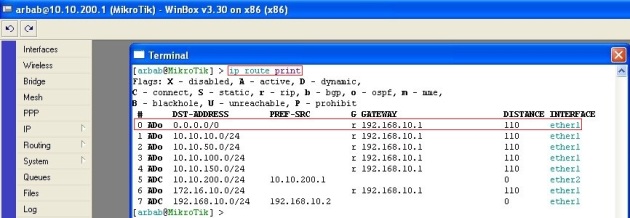
Route verification from Routers:

Test from Clients:

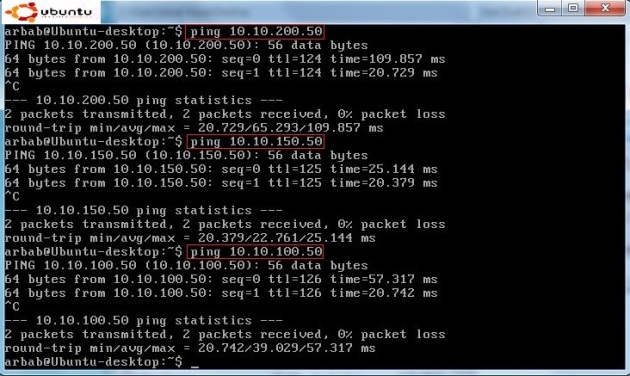
Make a simple test from Ubuntu-Desktop.

Make a simple test from WinXP-1.

Make a simple test from WinXP-2.

Make a simple test from WinXP-3.

Configure NAT on Cisco Router:

This is just a bonus section, in which we will configure the NAT on Cisco router and also propagate the default route in OSPF. I connect my Cisco Router to DSL Modem and configure it so that it will take IP address through DHCP, as well as configure the inside and outside interface for NAT.

Lazy man access -list for NAT (This is not the perfect access list):

NAT Overload:

Originate the default route in OSPF:

Verify the last resort information on Cisco Router:

Check default route information on all routers 🙂

Hope this will help you!

Please Remember me in your prayers!

Enjoy 🙂

How to block facebook in Mikrotik using L7 Protocols (Layer 7)

In Some Scenarios , We May need to Block Facebook Social Website or some others …In this tutorial, I will show you, how to achieve this goal using L7 (Layer7).

This tutorial consists of two parts:

1- Block facebook website for everyone on local network.

2- Allow facebook for specific host(s) and block for others on local network.

1- Block facebook website for everyone on local network.

First we check that Facebook is currently working on our local network or not?

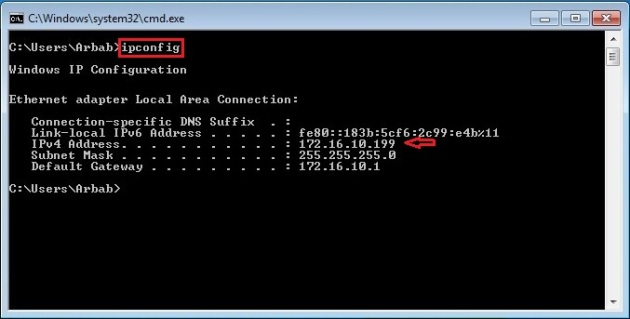
Check the IP address of our client?

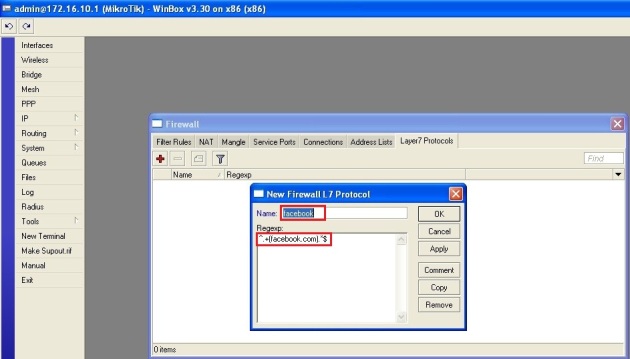
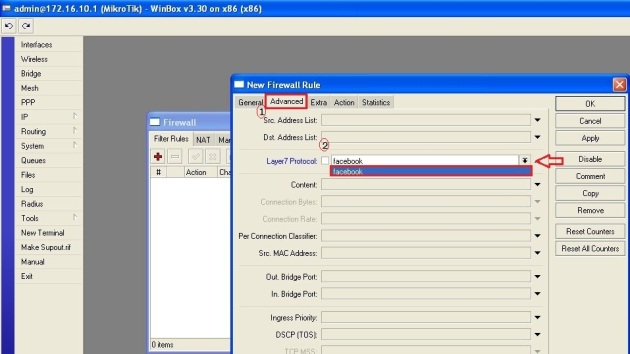
We need to create new Regexp rule at Layer7 Protocols, in order to block the facebook for our local network.

To achieve this goal, please follow these steps:

^.+(facebook.com).*$

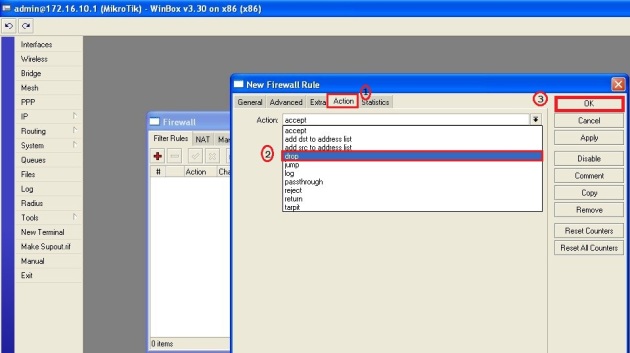
Now, we need to create Filter Rule, using these steps:

Now test the rule, that we just created:

Try also on 2nd client (172.16.10.199/24):

Check that it only block facebook or other websites also?

Oh yes, our rule is working perfectly 🙂

2- Allow facebook for specific host(s) and block for others on local network.

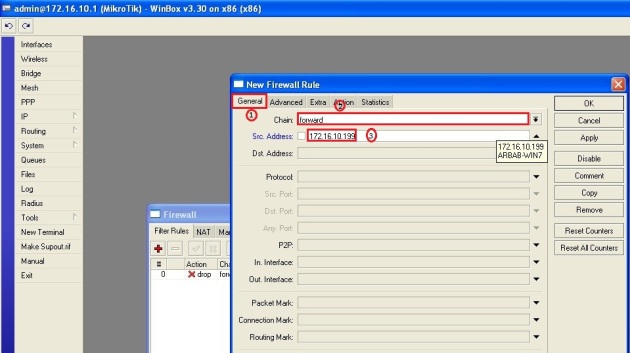
Now, we want to allow facebook for 2nd client (172.16.10.199/24) but still want to block it for other host(s).

To accomplish this goal, we need to create a second Filter rule, to do this, please follow these steps:

Move this rule at the top:

Test this rule on 2nd client (172.16.10.199/24):

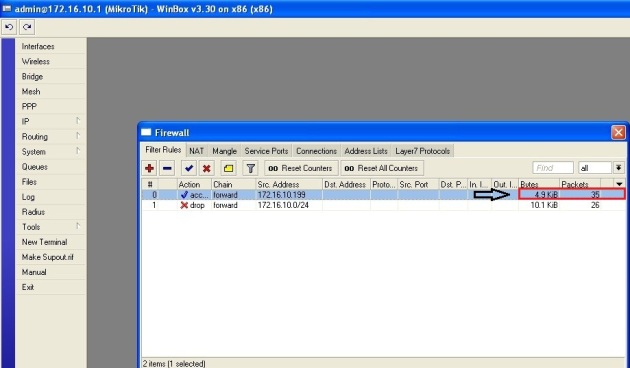
Verify the rule on Mikrotik:

Verify that, facebook is still blocked for other host(s) on the local network:

Verify the rule(s) on Mikrotik:

Drop packets rate are incremented!

We can do the same for youtube or any other website!

Hope this will help you!

Please Remember me in your prayers!

Enjoy 🙂

Configure Mikrotik DHCP to assign ip address to only authorized client(s)

Scenario:

Mikrotik is working as dhcp, dns, and default gateway for local network.

Extra Requirement:

Mikrotik only assign ip address(es) to authorized client(s) in our local network!

Here are the steps to achieve this requirement:

Connect to the Mikrotik router using it’s ip address through web browser:

Click on the button, select the ip address of Mikrotik, enter username and password, then click Connect:

IP —>DHCP Server

From the Leases tab, select the client(s), which are authorized to take ip address from Mikrotik router (in future) and then click Make Static:

Move to the DHCP tab and double-click on the DHCP Server and select the static-only from Address Pool drop down menu:

After that, only authorized client(s) will get ip address from Mikrotik. If you want that new client get an ip address from Mikrotik, then you can select the dhcp_pool1 from Address Pool drop down menu. After that Mikrotik will assign an ip address to new client, make this ip address to static (as described above) and select static-only again in order to disallow ip address assignment to unknown client(s).

Hope this will help you!

Please Remember me in your prayers!

Mikrotik as Gateway

Note: This is not the best tutorial on Mikrotik, but it is one of easiest tutorial to configure Mikrotik as gateway 🙂

Scenario:

In this scenario, Mikrotik will work as dhcp, dns, and default gateway for local network.

Local Network : 172.16.10.0/24

Public: 192.168.1.0/24 (In this scenario)

I assume that you already install the fresh copy of mikrotik  on any low end (P III, P IV or whatever) machine. Default username is “admin” and there is no password , by default.

Login to the Mikrotik router:

After login, you will see the screen something like this:

After login, first thing we need to do is to change password:

password

Check the interface(s) Setting by using this command:

interface print

Change the interface(s )name by using these commands:

interface set 0 name=WAN
interface set 1 name=LAN

Now, check the interface(s) again:

interface print

Assign the ip address to LAN interface:

ip address add address=172.16.10.1/24 interface=LAN

Assign the ip address to WAN interface:

ip address add address=192.168.1.169/24 interface=WAN

Now, check the ip address setting:

ip address print

Add the default route using this command:

ip route add gateway=192.168.1.1

Check the routing table:

ip route print

DNS setup on Mikrotik:

ip dns set primary-dns=8.8.8.8 secondary-dns=4.2.2.2
ip dns set allow-remote-requests=yes 

DNS settings check:

ip dns print

DHCP Configuration:

ip dhcp-server setup

Configuration of NAT on Mikrotik:

ip firewall nat add chain=srcnat action=masquerade out-interface=WAN

Testing from one of the Local Network’s Client:

Hope this will help you!

Please Remember me in your prayers!